Flowers
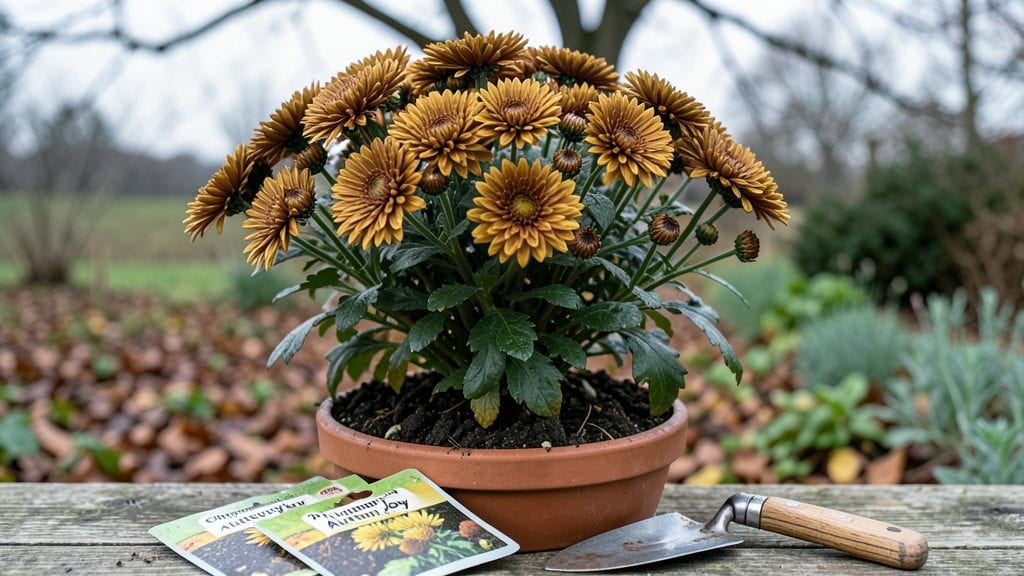
Autumn flowers seeds planted now will reward you with bold spring color that outshines anything from a nursery. 🌿 The layered chill method—stratifying seeds in fall—tricks them into breaking dormancy just as temperatures rise, giving you a head start on vibrant blooms like chrysanthemums and asters.
This technique works best for hardy perennials and cool-season annuals. You’ll need a mix of sandy loam soil, a shallow tray, and a cold frame or unheated garage. The process mimics winter’s natural freeze-thaw cycle, ensuring seeds germinate strong when spring arrives.
By early spring, you’ll see lush foliage emerging weeks ahead of store-bought plants. The blooms arrive thicker, last longer, and resist common spring pests that plague tender transplants. Even in Zone 5, this method extends the season by 4-6 weeks.
Perfect for gardeners in Zones 3-8 who want to skip the nursery line. The same approach works for pansies, snapdragons, and sweet alyssum—just adjust chill times based on seed packets. Let’s get those seeds stratified for next year’s showstopper garden.
📚 In This Guide
- What you need
- Instructions
- Tips and common mistakes
- Wrapping up and next steps
What you need
- ● Autumn-flowering seeds: Choose a mix of hardy annuals or perennials like cosmos, bachelor’s buttons, or sweet alyssum (1–2 oz per variety). Opt for organic, untreated seeds for best results.
- ● Seed trays or pots: 6–12 small (2–3 inch) pots or a single shallow tray (10x20 inches) with drainage holes.
- ● Potting mix: A lightweight, well-draining blend (e.g., 50% peat moss, 30% perlite, 20% vermiculite) or pre-mixed seed-starting soil (1–2 cubic feet).
- ● Plastic wrap or humidity dome: To retain moisture during germination.
- ● Labeled plant markers: Popsicle sticks or tags + a permanent marker to track seed varieties.
- ● Refrigerator or cold frame: A standard fridge (35–40°F) or a cold frame with temperature control for stratification.
- ● Moist paper towels or damp sphagnum moss: For wrapping seeds needing stratification (e.g., delphinium or lupine).
- ○ Plastic zip-top bags: Seal seeds + moisture source to prevent drying (optional for non-stratified seeds).
- ● Grow lights (LED or fluorescent) for indoor seedling support.
- ● Heat mat (70–75°F) to speed up germination post-chilling.
- ● Fungicide (neem oil or hydrogen peroxide) to prevent damping-off.
- ● Garden journal to log planting dates and progress!
Instructions for layered chill method with autumn flowers seeds
Here’s how to trick nature into blooming spectacularly next spring—no winter greenhouse needed.
🌱 Step 1: Stratify Seeds for Cold Exposure
Mix the seeds with the moistened peat moss in a sealed plastic bag. Place the bag in the refrigerator’s vegetable crisper (or any spot maintaining 34-40°F) for 4-8 weeks. This mimics winter’s natural cold period, breaking seed dormancy. Check weekly—if the moss dries out, spritz lightly with water to keep it damp but not soggy.
I’ve found that shorter stratification (4 weeks) works for tender perennials like black-eyed Susans, while longer (8 weeks) suits tougher natives like coneflowers. Don’t skip this—seeds that skip stratification often rot or sprout erratically.
⏰ Step 2: Sow Stratified Seeds at Proper Depth
Fill the seed-starting trays with the potting mix and press lightly to remove air pockets. Plant seeds at twice their diameter—most autumn flowers need ¼ to ½ inch depth. For example, coreopsis seeds go ¼ inch deep, while rudbeckia seeds need ½ inch. Use the fine mist spray bottle to dampen the soil surface without displacing seeds.
Label each tray with the variety and sowing date—spring blooms will look identical until they color up. Cover trays with clear plastic domes to retain humidity. Place them in a cool, bright spot (50-60°F) for 2-4 weeks until germination. Watch for first true leaves (not the initial seed leaves)—that’s your cue to remove the dome.
☀️ Step 3: Transition to Growing Conditions
Once seedlings show 3-4 true leaves, move trays to a sunny windowsill or under grow lights for 14-16 hours daily. If using lights, keep them 2-3 inches above seedlings—too close scorches leaves, too far stretches them. Rotate trays quarter-turn daily so plants grow straight, not lopsided.
Water from the bottom by placing trays in a shallow tray of room-temperature water for 10 minutes. Let excess drain completely before returning to light. Overhead watering can cause damping-off, a fungal disease that collapses seedlings overnight. You’ll know moisture is right when soil feels damp 1 inch down but not wet.
🪴 Step 4: Harden Off and Transplant
Two weeks before your last frost date, start hardening off. Place seedlings outside in partial shade for 1 hour the first day, gradually increasing to full sun exposure by day 7. Watch for wilting or yellowing—if it happens, they’re not ready yet. Acclimated seedlings will perk up within hours of returning indoors.
Transplant after all frost risk passes into the garden. Space plants according to mature size—12-18 inches apart for most perennials. Water deeply at planting to settle soil around roots. Mulch with 1 inch of shredded bark to retain moisture and suppress weeds. Blooms will appear 8-12 weeks after transplanting, depending on the variety.
Tips & tricks for perfect autumn flower seed stratification
These pro tips will help you maximize your autumn flower seeds' potential for vibrant spring blooms.
Temperature Consistency is Key: The refrigerator’s vegetable crisper maintains the ideal 34-40°F range for stratification, but if your fridge runs hotter, consider using a dedicated seed fridge or even a garage cooler during winter months. I’ve seen seeds fail to break dormancy when exposed to temperatures above 40°F—they simply won’t germinate properly. Check your fridge’s temperature with a thermometer to be sure, and adjust placement if needed.
Seed Depth Matters: When planting in Step 2, use a toothpick to create small holes at exactly twice the seed diameter—most autumn flowers need ¼ to ½ inch depth. For tiny seeds like coreopsis, a gentle press with your finger works better than digging. I’ve learned the hard way that planting too deep can prevent seedlings from breaking through the soil surface, while planting too shallow risks drying them out before germination.
Lighting Strategy for Germination: While the cool 50-60°F spot for germination might seem counterintuitive, these temperatures prevent leggy seedlings. Place trays near a north-facing window or under cool-white fluorescent lights (not LED grow lights, which run hotter). I’ve had success using a simple shop light on a timer for 12 hours daily during germination—just keep it 6 inches above the seedlings to avoid overheating.
Harden Off Gradually: The 1-hour to full sun progression in Step 4 is crucial, but don’t rush it. I’ve seen seedlings collapse from sudden sun exposure after just 3 days of hardening off. Start with 30 minutes on day 1 if your seedlings look particularly delicate, then increase by 30 minutes daily. Watch for color—healthy seedlings should be a vibrant green, not pale or yellowing.
Pro Tips for Autumn Flowers Seeds
- These pro tips will help you maximize your autumn flower seeds' potential for vibrant spring blooms.
- I’ve seen seeds fail to break dormancy when exposed to temperatures above 40°F—they simply won’t germinate properly.
- Seed Depth Matters: When planting in Step 2, use a toothpick to create small holes at exactly twice the seed diameter—most autumn flowers need ¼ to ½ inch depth.
Frequently asked questions
Got questions about growing autumn flowers from seeds using the layered chill method? Here’s what you need to know before diving in!
When should I start the layered chill process for autumn flowers?
The best time to begin is 6–8 weeks before your first expected frost in autumn. For most climates, this means starting in late summer (August–early September). This gives seeds enough time to stratify naturally and sprout by spring. Check your local frost dates to adjust timing!
Can I use regular potting soil for the layered chill method?
While you can use regular potting soil, a moist, well-draining mix with perlite or sand works best. The goal is to mimic outdoor conditions—add a 50/50 blend of soil and coarse sand or coconut coir for better aeration. Avoid heavy clay soils, which can trap moisture and rot seeds.
What if my seeds don’t germinate after chilling?
Don’t panic! First, check if your seeds are fresh (not expired)—old seeds may lose viability. Next, ensure they’ve had consistent moisture (not soggy) and proper light (bright but indirect) after chilling. If still no luck, try re-stratifying them for another 2–4 weeks or test a few seeds in warm water to see if they’re viable.
Are there easy autumn flowers for beginners?
Start with hardy, cold-tolerant varieties like:
- Sweet Alyssum – Fast-growing, fragrant, and loves cool weather.
- Calendula – Edible, drought-resistant, and thrives in mild autumn temps.
- Pansies – Colorful and cold-hardy; perfect for early spring blooms.
- Larkspur – Dramatic spikes that handle light frost.
How long does the layered chill method take?
The process typically takes 4–8 weeks, depending on the seed type and your climate. Most seeds need 6–8 weeks of cold stratification (40–50°F) to break dormancy. After chilling, germination can take 7–21 days once you move them to warmth. Patience is key—some seeds (like poppies) may take longer!
Pro Tip:
Label your seed trays with the date started and flower type to avoid mix-ups. A simple popsicle stick or plant marker works perfectly! Also, rotate trays occasionally for even light exposure—this prevents leggy seedlings.
Wrapping up and next steps
Embracing the layered chill method for autumn flower seeds is your ticket to a vibrant, show-stopping spring garden! 🌸 With the right seeds, patience, and a little winter magic, you’ll transform bare soil into a burst of color.
Ready to dive in? Start small—pick 2-3 varieties this season—and watch your green thumb flourish!
Next step:
- 📅 Mark your calendar for late fall planting (or order seeds now!).
- 🌱 Grab your supplies (or reuse what you have!) and get stratifying.
- 💬 Share your progress—tag us in your spring blooms! #AutumnSeedsSpringDreams