Size
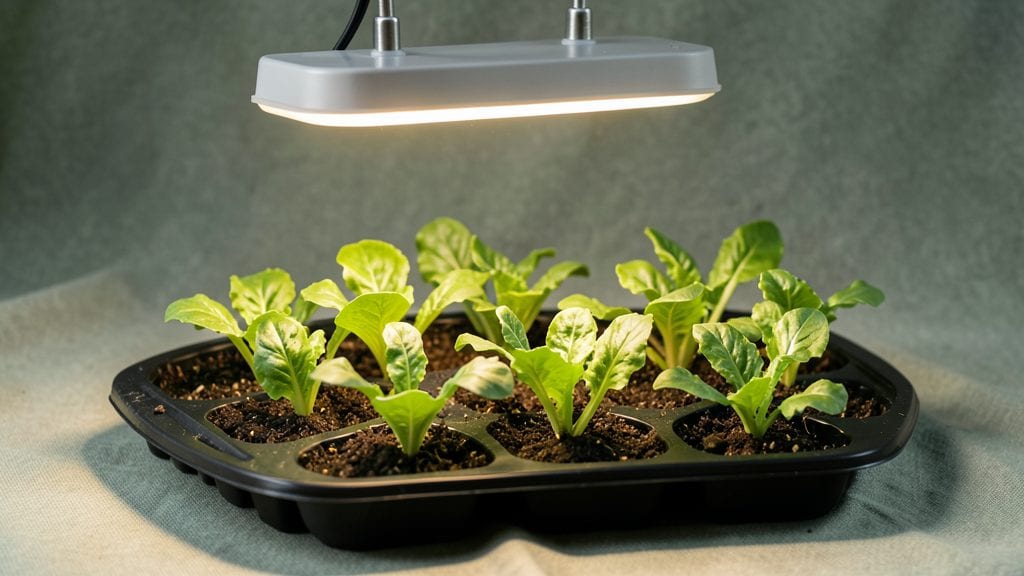
Growing seeds inside year-round means fresh starts anytime—no waiting for spring. I’ve turned my kitchen counter into a mini greenhouse, and you can too with just a few supplies and a little patience.
The first time I saw those tiny green hooks poking through the soil in December, I knew I’d never go back to buying seedlings again.
You’ll need seed-starting mix (not regular potting soil), small containers with drainage, and a way to provide light—whether it’s a sunny windowsill or a basic grow light. Most seeds germinate in 7-14 days, and once they sprout, they’ll need 12-16 hours of light daily to stay strong.
Temperature control is key too; keep things between 65-75°F for best results.
By the time your seedlings are ready to transplant, they’ll be stocky and vibrant, not the leggy, weak plants you sometimes get from stores. The best part? You can grow herbs, lettuce, peppers, and even tomatoes indoors all winter long, then move them outside when the weather warms up.
No more rushing to the nursery or settling for sad little transplants.
This method works for any space—apartment windowsills, basement setups, or even under desk lights. The only limit is your imagination (and how much you love watching things grow). Let’s get those seeds sprouting!
📚 In This Guide
- What you need
- Instructions
- Tips and common mistakes
- Wrapping up and next steps
What you need
- ● Seeds: Choose fast-growing varieties like microgreens (e.g., radish, broccoli, sunflower), sprouts (alfalfa, lentils, mung beans), or herbs (basil, cilantro). Start with 1–2 tbsp per container.
- ● Growing Containers: Small mesh sprouting lids (for jar sprouting) OR
- ● Wide-mouth mason jars (16–32 oz, 1–2 per seed type)
- ● Shallow trays or plastic bins (10"x20" for microgreens, with drainage holes)
- ● Water: Room-temperature, filtered water (avoid tap water with chlorine; let it sit out for 24 hours if needed). 1–2 cups per jar/tray.
- ○ Growing Medium (Optional but Helpful): For sprouts: No soil needed—just water!
- ● For microgreens: 1–2 inches of organic potting mix or coconut coir in trays.
- ● Light Source: Grow lights: Full-spectrum LED (12–16 hours/day, 6–12" above plants)
- ● Sunlight alternative: Place near a south-facing window (if weak, supplement with a 10W–20W bulb).
- ● Spray Bottle: For gentle watering (especially for microgreens).
- ● Scissors or Knife: To trim roots or harvest sprouts.
- ● Humidity Dome: Clear plastic wrap or a cloche to retain moisture during germination.
- ● pH Test Strips: To monitor water acidity (ideal: 6.0–7.0 for sprouts).
- ● Seedling Heat Mat: For faster germination (70–75°F).
- ● Notebook: Track seed types, planting dates, and harvest times!
- ● Organic Fertilizer: Diluted fish emulsion or compost tea for microgreens (after 1st true leaves).
Step-by-Step instructions for growing seeds indoors
Here's how to coax life from seeds year-round without relying on natural sunlight.
Prepare Your Growing Containers and Mix
Start by filling your 4 seed-starting trays with 2 gallons of seed-starting mix—this lightweight, sterile blend prevents damping-off and compacts less than garden soil. I press it down gently with my fingers until the surface is firm but not packed. The goal is to eliminate air pockets while keeping the mix loose enough for tender roots to penetrate easily.
Moisten the mix thoroughly using a spray bottle until it feels uniformly damp, like a wrung-out sponge. Avoid oversaturating it; you want moisture without puddles. This pre-moistening ensures even water distribution when you plant. I like to work in small batches if I'm prepping multiple trays, as the mix can dry out quickly once exposed to air.
Sow Seeds at the Correct Depth and Spacing
Refer to each seed packet for depth guidelines, but a general rule is to plant seeds twice as deep as their diameter. For tiny seeds like lettuce, this might mean pressing them just below the soil surface, while larger seeds like beans can go ½ inch deep. I use a toothpick to make small holes—it’s precise and prevents overcrowding.
Space seeds ¼ to ½ inch apart within rows, depending on their mature size. Overcrowding leads to weak, leggy seedlings competing for light. After sowing, cover the seeds lightly with additional mix, then mist the surface again with water. A fine mist ensures seeds stay in place without washing away. Label each tray immediately with the seed type and date—trust me, you’ll forget in a week.
Provide Warmth and Humidity for Germination
Seeds need warmth to germinate, ideally 70–80°F. Place your trays on a seedling heat mat set to 75°F—this mimics outdoor spring conditions and speeds up germination. Cover the trays with clear plastic domes to retain humidity; condensation on the inside is a good sign. Check daily for moisture, but resist the urge to water unless the soil feels dry to the touch.
Germination times vary by seed type, but most sprouts appear within 5–14 days. Once 50% of seeds have emerged, remove the domes immediately to prevent fungal growth. This is the moment that matters: too much moisture now invites damping-off, where seedlings collapse overnight. Keep the trays in a warm, dark spot until sprouts break through—light isn’t needed yet.
Introduce Light Gradually to Prevent Legginess
The instant seedlings emerge, move them under a grow light positioned 2–3 inches above the tallest sprout. Use a full-spectrum LED bulb for 14–16 hours daily, mimicking summer sunlight. Without enough light, seedlings stretch toward the source, becoming weak and spindly. You’ll notice leggy growth as thin stems with widely spaced leaves—this is a red flag.
Raise the light as seedlings grow to maintain the 2–3 inch gap. Rotate trays quarter-turn daily so plants grow straight, not lopsided. If your seedlings develop a pale, elongated look, they’re begging for more light. Strong seedlings have thick stems, dark green leaves, and compact spacing between nodes. This phase is critical—rush it, and you’ll end up with floppy, transplant-shock-prone plants.
Harden Off and Transplant When Ready
Two weeks before your last frost date, begin hardening off seedlings. Start by placing them outside in a sheltered, shaded spot for 1–2 hours the first day. Gradually increase exposure by 1 hour daily over 10–14 days, letting them acclimate to wind and sun. This step is non-negotiable—skipping it burns leaves and stresses plants severely.
Seedlings are ready for transplant when they’ve developed 3–4 true leaves and their stems feel sturdy to the touch. Dig holes just deep enough to bury the first set of leaves, then water deeply at the base. Avoid disturbing roots—gentle handling ensures a smoother transition. If moving outdoors, transplant on an overcast afternoon to reduce shock. With patience, your indoor starts will thrive in their new home.
Tips & tricks for perfect indoor seed sprouting
Mastering indoor seed growth requires attention to detail—these insights will help you avoid common pitfalls and maximize success with your 4 seed-starting trays and 2 gallons of seed-starting mix.
Soil Preparation Secret: When pressing down your seed-starting mix in Step 1, aim for a texture similar to a damp sponge—firm enough to eliminate air pockets but still crumbly when squeezed. I find using a flat-bottomed container to gently press the mix works better than fingers for even distribution. This balance prevents both compaction (which stifles roots) and excessive looseness (which can't support seedlings). The key is to replicate the natural aeration of outdoor soil while maintaining moisture retention.
Germination Temperature Nuance: While the instructions specify 75°F on your seedling heat mat, I've found that most seeds actually germinate best within the broader 70–80°F range. The critical factor is consistency—fluctuations wider than 5°F can delay germination. If your home runs cooler, consider placing a small space heater near the trays during germination (but never exceed 80°F). For heat-sensitive seeds like lettuce, maintain the lower end of this range to prevent pre-mature sprouting.
Light Transition Strategy: In Step 4, when moving seedlings under grow lights, position the bulb at 2–3 inches initially, but be prepared to adjust daily. I've seen seedlings grow toward the light within 24 hours—if you notice this "leggy" growth, immediately raise the light to maintain that 2–3 inch gap. The goal is to create a gradual light intensity increase rather than shocking tender seedlings. For best results, use a timer to automate your 14–16 hour light cycle, ensuring consistent exposure without manual intervention.
Harden Off Like a Pro: The 10–14 day hardening off period in Step 5 is your seedlings' final test before outdoor life. I recommend starting with just 30 minutes on day one rather than the full 1–2 hours—this gradual approach prevents shock. Watch for wilting as your first indicator; if leaves droop slightly but perk up after returning indoors, you're progressing at the right pace. On the final day, leave seedlings outside overnight if temperatures stay above 50°F to fully acclimate them.
Pro Tips for Grow Seeds Inside
- Mastering indoor seed growth requires attention to detail—these insights will help you avoid common pitfalls and maximize success with your 4 seed-starting trays and 2 gallons of seed-starting mix.
- Soil Preparation Secret: When pressing down your seed-starting mix in Step 1, aim for a texture similar to a damp sponge—firm enough to eliminate air pockets but still crumbly when squeezed.
- Germination Temperature Nuance: While the instructions specify 75°F on your seedling heat mat, I've found that most seeds actually germinate best within the broader 70–80°F range.
Frequently asked questions
Got questions about growing seeds indoors? You’re not alone! Here are some of the most common concerns—and their solutions—to help you sprout like a pro, even without sunlight.
What’s the fastest seed to grow indoors without sunlight?
Microgreens and sprouts (like lentils, radishes, or sunflower seeds) are your best bet—they sprout in 3–7 days with just water and a dark, humid environment. Avoid slow starters like beans or peas unless you’re patient (or have a grow light!).
How long can I leave seeds soaking before planting?
Most seeds need 6–12 hours of soaking, but never exceed 24 hours or they’ll rot. Rinse and drain thoroughly after soaking, then transfer to your growing jar or tray. Pro tip: Use filtered water to avoid mold.
Do I need special lights, or can I use regular bulbs?
While sunlight is ideal, LED grow lights (or even a bright fluorescent bulb) work in a pinch—just keep them 2–4 inches above your seeds for 12–16 hours/day. Skip incandescent bulbs; they generate too much heat and little light.
Why are my seeds moldy or smelly?
Mold or foul odors mean too much moisture or poor airflow. Rinse seeds 2x daily, drain excess water, and tilt your jar slightly to prevent stagnation. If mold appears, toss the batch—it’s unsafe to eat.
Can I reuse the same growing container for multiple batches?
Yes! Clean your jar or tray with vinegar or hydrogen peroxide between uses to kill bacteria. Avoid soap—it can leave residue that stunts growth. Just air-dry completely before your next sprout session.
Wrapping up and next steps
Growing seeds indoors is a rewarding way to enjoy fresh, nutrient-rich sprouts year-round—no sunlight required! 🌱 With the right setup, patience, and a little care, you’ll soon be harvesting crisp greens, crunchy beans, or tangy microgreens to elevate your meals.
Whether you’re a beginner or a seasoned gardener, this method proves that green thumbs aren’t just for outdoors.
Ready to take the next step? Start small—try a single tray of your favorite seeds, like broccoli or radish, and experiment with flavors.
Once you’ve mastered the basics, expand your indoor garden with new varieties or even a full hydroponic system. Your kitchen (and taste buds) will thank you! 🌟