Planting
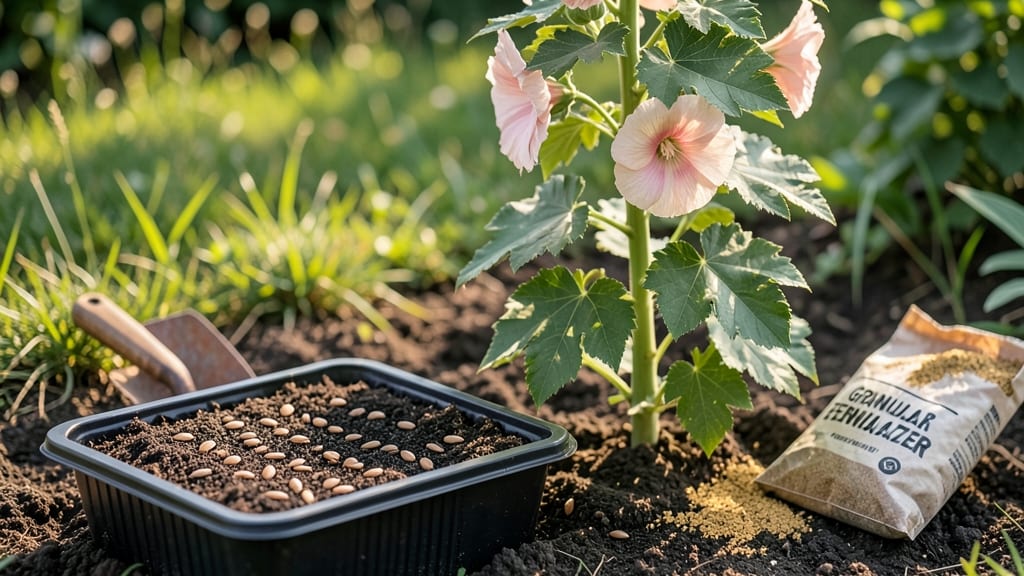
Sowing hollyhock seeds with the cold moisture trick is how I finally broke the 50% germination curse that haunted my first three attempts. 🌱 Those tall, velvety blooms deserve better than spotty starts, and this method delivers reliable results—even for beginners who’ve given up after watching seeds refuse to sprout.
The secret isn’t fancy equipment—just a damp paper towel, a clear plastic bag, and patience. I’ve tried direct sowing in spring, but hollyhocks respond best when pre-chilled for 2-3 weeks before planting.
This mimics their natural cycle and triggers those stubborn seeds to wake up. Once they’ve germinated indoors, you’ll transplant sturdy seedlings that outpace anything bought from a nursery.
By late spring, you’ll be rewarded with towering stems reaching 5-6 feet, their papery blooms in shades of pink, purple, and white drawing hummingbirds like magnets. The trick works for both cottage gardens and small urban plots—just give them full sun and space to sway in the breeze.
No more guessing games about whether your seeds will cooperate.
Here’s where it gets interesting: hollyhocks pair beautifully with roses, lavender, and delphiniums, creating vertical drama that makes your garden feel like a storybook illustration. Let’s get those seeds sprouting—your future garden’s centerpiece is waiting.
📚 In This Guide
- What you need
- Instructions
- Tips and common mistakes
- Wrapping up and next steps
What you need
- ● Hollyhock seeds: Choose heirloom or organic varieties (e.g., 'Black Prince,' 'Peach Blush,' or 'Chater’s Double'). Aim for 10-20 seeds per planting area (or 1 packet for beginners).
- ● Seed-starting trays or pots: 2-3" deep with drainage holes. 4-6 cell trays or small peat pots work best (biodegradable options are eco-friendly!).
- ● High-quality seed-starting mix: Lightweight, sterile, and well-draining (e.g., Pro-Mix BX or a 50/50 blend of peat moss and perlite). Avoid garden soil—it’s too dense!
- ● Clear plastic dome or plastic wrap: To create a mini greenhouse effect (or use a humidity tent made from a ziplock bag).
- ● Spray bottle with water: A fine-mist setting is key for gentle hydration.
- ● Plant labels: Wooden or plant markers to track varieties (especially if sowing multiple types).
- ○ Gloves: Protect your hands from prickly hollyhock stems (optional but highly recommended!).
- ○ Heat mat (optional): Speeds up germination if your space is chilly (70–75°F is ideal).
- ● Grow lights: For indoor sowing—place lights 2–3 inches above seedlings (14–16 hours/day).
- ● Fertilizer (balanced, water-soluble): Dilute to half-strength once seedlings sprout (e.g., 10-10-10 or fish emulsion).
- ● Cold frame or outdoor cold frame: If sowing directly outside in early spring (requires 4–6 weeks of frost tolerance).
- ● Tweezers: For delicate seed handling (especially tiny hollyhock seeds).
Step-by-Step instructions for sowing hollyhock seeds
Here's how I guarantee strong, healthy starts using a simple cold-moisture method.
🌱 Step 1: Prepare the Seeds with the Cold Moisture Trick
Hollyhock seeds need a cold, moist environment to break dormancy. Place the seeds in a small bowl and cover them completely with lukewarm water. Let them soak for 24 hours—this softens the hard seed coat and kickstarts germination. I like to use a shallow bowl so I can easily check progress without disturbing the seeds.
After soaking, drain the water and wrap the seeds in a damp paper towel. Place the towel inside a resealable plastic bag, squeezing out excess air before sealing. Store the bag in your refrigerator for 7-10 days. This cold stratification mimics winter conditions and signals the seeds it's time to grow.
🪴 Step 2: Choose Containers and Fill with Moisture-Retentive Mix
Use 4-6 inch deep containers with drainage holes—hollyhocks have deep taproots and need room to establish. I prefer biodegradable pots because they let me transplant without disturbing roots. Fill each container about 2/3 full with a mix of 50% potting soil and 50% perlite to improve drainage while retaining moisture.
Moisten the mix until it feels like a damp sponge—you should be able to squeeze a handful and see moisture bead up, but it shouldn't drip. Press the soil down lightly to remove air pockets, then create small furrows about 1/4 inch deep. Hollyhock seeds are tiny, so I use a toothpick to make precise planting lines.
💧 Step 3: Plant the Seeds at the Right Depth and Cover Lightly
After the cold treatment, remove the seeds from the refrigerator and let them sit at room temperature for 30 minutes to prevent shock. Plant 2-3 seeds per container, spacing them about 1 inch apart in the furrows. Cover them with a thin layer of soil—just enough to hide the seeds completely but no deeper than 1/8 inch. Press gently to ensure good soil contact.
Water lightly with a spray bottle until the soil surface looks evenly moist. Hollyhock seeds need consistent moisture to germinate, but they’ll rot if they’re waterlogged. I like to mist the soil until water runs out the drainage holes, then stop—this ensures the roots get hydrated without sitting in soggy conditions.
☀️ Step 4: Provide Warmth and Indirect Light for Germination
Place the containers in a warm spot with indirect light—think under a grow light or on a sunny windowsill shielded from direct afternoon sun. Hollyhocks germinate best at 65-75°F, so if your home runs cooler, consider using a seedling heat mat. You should see sprouts in 14-21 days, though some varieties may take longer.
Once the seeds sprout, move the containers to a brighter spot but avoid full sun until the seedlings have 2-3 true leaves. Too much direct light too soon can scorch young, tender leaves. Watch for leggy growth—a sign the seedlings aren’t getting enough light. If you notice them stretching toward the light, adjust the grow light to stay 2-3 inches above the seedlings.
⏰ Step 5: Thin Seedlings and Prepare for Transplanting
When seedlings reach 2 inches tall, thin them to the strongest one per container. Use small scissors to snip the weaker seedlings at soil level—this prevents disturbing the roots of the remaining plant. Hollyhocks grow best with plenty of space, so transplant them into larger containers or the garden when they have 4-6 true leaves and are at least 4-6 inches tall.
Hardening off is key before moving hollyhocks outdoors. Start by placing them outside in a sheltered spot for 1-2 hours daily, gradually increasing exposure over 7-10 days. Hollyhocks are tough once established, but they need time to adjust to outdoor conditions. Plant them in well-draining soil with full sun exposure for the best growth and blooms.
Tips & tricks for perfect hollyhock germination
Here's what I've learned after years of perfecting this cold-moisture method for hollyhocks.
The Moisture Factor: During the 24-hour soak in Step 1, I like to change the lukewarm water after 12 hours to prevent bacterial growth. The water should always cover the seeds completely—if they're exposed to air even briefly, they won't absorb enough moisture to break dormancy.
Cold Stratification Secret: For the 7-10 day refrigerator stage, I place the sealed bag on a middle shelf where the temperature stays consistently around 35-40°F. This mimics natural winter conditions perfectly. If your fridge runs warmer, you might need to extend the cold treatment by 2-3 days—just watch for mold before making adjustments.
Container Wisdom: When choosing your 4-6 inch deep containers in Step 2, I recommend using clear plastic ones so you can easily monitor moisture levels without disturbing the soil. The 50% perlite mix is crucial—it prevents compaction while still holding enough moisture for those tiny seeds. Press the mix firmly but gently to eliminate air pockets that could dry out the seeds.
Lighting Strategy: For the germination phase in Step 4, I've found that positioning containers under a grow light on a timer (14 hours on, 10 hours off) gives more consistent results than natural light alone. The 65-75°F range is critical—if your home runs cooler, a simple seedling heat mat under the containers makes all the difference in speeding up germination.
Pro Tips for Sowing Hollyhock Seeds
- Here's what I've learned after years of perfecting this cold-moisture method for hollyhocks.
- The Moisture Factor: During the 24-hour soak in Step 1, I like to change the lukewarm water after 12 hours to prevent bacterial growth.
- Cold Stratification Secret: For the 7-10 day refrigerator stage, I place the sealed bag on a middle shelf where the temperature stays consistently around 35-40°F.
Frequently asked questions
Got questions about sowing hollyhock seeds? You’re not alone!
Here are the most common queries—and expert answers—to help you grow stunning hollyhocks with confidence.
When is the best time to plant hollyhock seeds outdoors?
Hollyhocks thrive in cool seasons. For best results, sow seeds 4–6 weeks before your last frost date in spring (typically March–April in most zones) or directly in late summer/early fall (August–September). Avoid planting in scorching summer heat—seeds may dry out before germinating.
How long do hollyhock seeds take to germinate?
With the cold-moisture trick, germination happens in 10–21 days. Keep soil consistently moist (not soggy) and in 50–70°F (10–21°C) temps. If seeds take longer, check for dry soil or overheating—they need patience!
Can I start hollyhock seeds indoors first?
While possible, hollyhocks don’t transplant well due to delicate roots. For higher success, direct-sow outdoors in well-drained soil. If you must start indoors, use biodegradable pots and harden off seedlings for 2 weeks before moving them gently into the garden.
Why aren’t my hollyhock seeds sprouting? Troubleshooting tips.
Common culprits:
- Dry soil: Hollyhock seeds need consistent moisture—mist lightly daily until germination.
- Too warm: Seeds may rot if soil exceeds 80°F (27°C). Use shade cloth if needed.
- Old seeds: Store seeds in a cool, dry place—viability drops after 2–3 years.
- Poor soil: Amend with compost for better drainage and nutrients.
Are there any alternatives to traditional hollyhock seeds?
Yes! Try these low-maintenance options:
- Pre-started seedlings: Buy from nurseries (check for healthy, sturdy stems).
- Hybrid varieties: Some, like ‘Black Night’ or ‘Chater’s Double’, offer disease resistance.
- Self-sowing: Let mature plants drop seeds naturally—they’ll pop up next year!
Wrapping up and next steps
Sowing hollyhock seeds is a rewarding journey that combines patience with a touch of science—like the cold moisture trick—to unlock those stunning, towering blooms. Whether you’re a seasoned gardener or just starting, remember: the key is consistency in moisture, timing, and a little extra care during those early weeks.
Now that you’ve got the know-how, there’s nothing left but to roll up your sleeves and dig in! 🌱
Your Next Step:
- Mark your calendar for your first frost date—hollyhocks thrive when sown in early spring or late summer!
- Grab your supplies and start sowing—your future garden will thank you.
- Share your progress (or blooms!) with fellow gardeners—community tips can make all the difference!