
Lawn
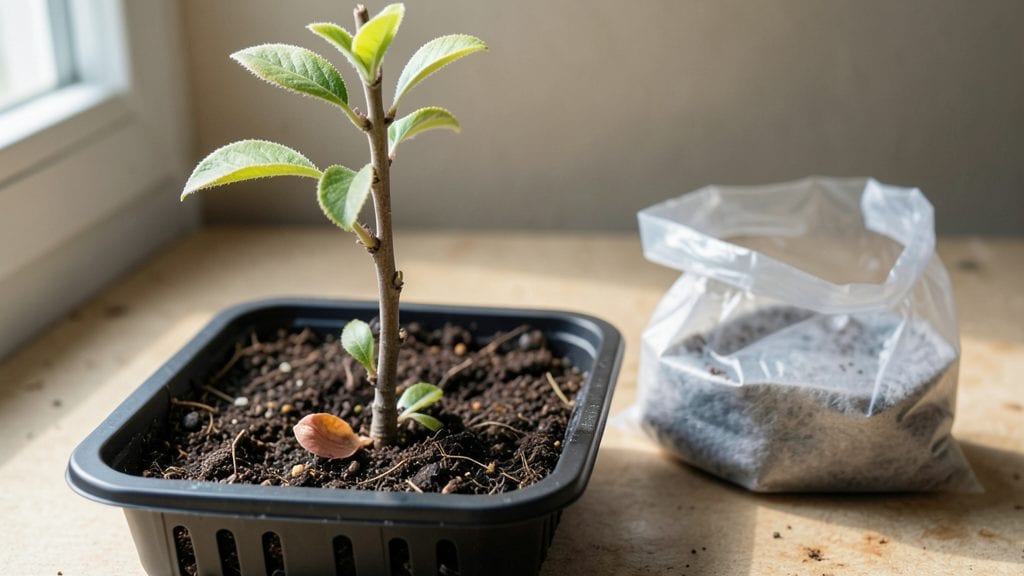
Peach seed stratification mimics nature's way of breaking dormancy—soaking seeds in layered moisture until they're ready to sprout. 🌱 I learned the hard way that skipping this step means waiting years for germination, if it ever happens.
The key is cold, consistent dampness that tricks the seed into thinking winter's over.
All you need is a plastic bag, some damp paper towels, and a fridge. No fancy equipment—just patience and the right timing. Start in late fall, and by spring, you'll have seeds eager to grow.
The process takes about 4-6 months, but it's worth it for those first green shoots.
You'll end up with seedlings that push through the soil in 2-4 weeks after planting, instead of waiting months. The roots develop stronger, and the trees grow faster because they bypass the natural dormancy cycle. It's like giving your future peach tree a head start.
Works for any stone fruit seed—plums, apricots, even almonds. Once you master this, you can experiment with other seeds that need the same cold treatment. Let's get those seeds ready for spring!
📚 In This Guide
- What you need
- Instructions
- Tips and common mistakes
- Wrapping up and next steps
What you need
- ● Fresh peach pits (seeds): 5–10 clean, firm pits (avoid soft or moldy ones).
- ● Well-draining potting mix: 1–2 gallons of a blend like cactus/succulent mix (sterilized).
- ● Ziploc bags or airtight containers: 1–2 quart-sized bags (or small jars with lids).
- ● Paper towels or coffee filters: 2–3 sheets (for moisture control).
- ● Spray bottle: 1 (with water) for gentle hydration.
- ● Refrigerator: A cold, dark space (34–40°F) for stratification.
- ● Small pots or seed trays: 1–2 (4–6" diameter) for post-stratification planting.
- ○ Plastic wrap or humidity dome: 1 sheet (optional but helpful for humidity).
- ● Hydrogen peroxide (3%): 1 small bottle (for sterilizing pits if needed).
- ● Grow lights: 1–2 (to supplement weak natural light post-stratification).
- ● Label markers: 1 (to track seed varieties and dates).
- ● Heat mat: 1 (for faster germination if impatient!).
How to stratify peach seeds for reliable spring germination
This layered moisture method mimics nature’s way of breaking seed dormancy—no fancy equipment needed.
🌱 Step 1: Extract and Clean the Seeds
Cut open a fresh, ripe peach and remove the pit. Use a knife to carefully split the hard shell lengthwise—this exposes the seed inside. Rinse it under cool water to remove any remaining fruit pulp, which can rot during stratification. Pat the seed dry with a paper towel and let it air-dry for 12 hours to prevent mold.
Here's the thing—peach seeds have a tough outer coat that blocks moisture. The drying step helps prevent premature rot while keeping the seed viable. You'll know it's ready when the outer shell feels slightly rough but not sticky.
💧 Step 2: Cold-Moisten Stratification in Damp Sand
Fill a small plastic bag with 1 cup dampened sand (moisten until it holds together when squeezed but doesn’t drip). Place the cleaned peach seed inside the bag, seal it, and label it with the date. Store the bag in your refrigerator’s crisper drawer, where temperatures stay around 35-40°F.
Check the bag every 2 weeks—the sand should stay lightly moist, like a wrung-out sponge. If it dries out, sprinkle a few drops of water inside the bag. This cold, moist environment tricks the seed into thinking winter has passed, breaking its dormancy.
⏰ Step 3: Monitor for Germination Signs
After 8-12 weeks, remove the bag from the fridge and inspect the seed. You’ll see a tiny white root (radicle) emerge first, followed by a curled shoot. Once the radicle reaches ½ inch long, it’s time to plant—don’t wait longer or the seed may dry out.
This is the moment that matters: if the seed stays dormant past 12 weeks, it may have lost viability. I’ve found that seeds stratified in 35-40°F consistently germinate, while warmer fridge spots (like the door) often fail.
🌿 Step 4: Plant the Stratified Seed
Fill a small pot with well-draining potting mix and plant the germinated seed ½ inch deep, covering it lightly. Water gently until the soil feels evenly moist but not soggy. Place the pot in a warm, bright spot (like a south-facing windowsill) with indirect light.
Keep the soil moist—not wet—until the seedling emerges. Overwatering now will cause the seed to rot before it sprouts. You’ll see the first true leaves appear in 4-6 weeks, signaling it’s time to move it outdoors after hardening off.
☀️ Step 5: Transition to Outdoor Conditions
Once the seedling has 4-5 leaves, move it outside during the day and bring it back in at night for 10-14 days. Gradually increase outdoor time until it can stay out overnight. Plant it in the garden after the last frost when soil temperatures reach 60°F.
Real talk: peach trees grown from seed take 5-7 years to bear fruit, but the process is rewarding. The stratification method ensures you’ll have a strong, healthy start—no guesswork involved.
Tips & tricks for perfect peach seed stratification
A few simple strategies will help you maximize your peach seed germination success this spring.
Drying Time Matters: That 12-hour air-drying period in Step 1 is crucial—don't skip it! I learned this the hard way after watching seeds develop mold during stratification. The drying removes excess moisture from the seed coat while keeping it viable. Place the seed on a paper towel in a single layer and let it sit in a well-ventilated spot. You'll know it's ready when the shell feels slightly rough but not damp to the touch.
Sand Selection Tip: Not all sand works equally well for stratification. Use coarse sand from a hardware store (like the kind used for sandboxes) rather than fine beach sand. The larger particles create better airflow around your seed, preventing rot while maintaining consistent moisture. If you can't find coarse sand, perlite or vermiculite work as excellent substitutes—they're designed to hold moisture without compacting.
Temperature Consistency: The 35-40°F range in your refrigerator's crisper drawer is perfect for mimicking winter conditions. Avoid storing seeds near the fridge door where temperatures fluctuate—those seeds often fail to germinate. Pro tip: Place a thermometer in your crisper drawer to monitor temperature. If it's running warmer than 40°F, move your seed bag to a cooler spot or consider a dedicated seed stratification fridge if you're doing this often.
Germination Timeline: The 8-12 week stratification window might seem long, but it's essential for breaking dormancy. I recommend checking your seeds at the 8-week mark—if you see no signs of germination, give it another 2 weeks. Remember, the radicle (that first white root) is what you're waiting for. If you see mold or an unpleasant smell, your seed has likely rotted—start fresh with a new seed.
Pro Tips for Peach Seed Stratification
- A few simple strategies will help you maximize your peach seed germination success this spring.
- Drying Time Matters: That 12-hour air-drying period in Step 1 is crucial—don't skip it!
- Sand Selection Tip: Not all sand works equally well for stratification.
Frequently asked questions
Got questions about peach seed stratification? You’re not alone! Here are answers to the most common queries to help you grow those dreamy spring blooms with confidence.
How long does peach seed stratification need to last?
Peach seeds typically require 6–12 weeks of cold stratification to break dormancy. Place them in the fridge (not the freezer!) in a sealed container with moist paper towels or peat moss. Patience pays off—longer stratification can improve germination rates!
Can I speed up the process?
No shortcuts for nature’s timeline, but you can simulate winter conditions by using a mix of vermiculite and water in a sealed bag, stored in a cool, dark spot (like a garage). Avoid heat or direct sunlight—consistency is key!
What’s the ideal temperature for stratification?
Aim for 34–40°F (1–4°C), mimicking natural winter chills. Most household fridges (top shelf) work perfectly. If your fridge fluctuates, wrap the container in a towel for extra insulation. Never freeze!
What if my seeds rot during stratification?
Rot usually means too much moisture or poor airflow. Drain excess water, use sterilized materials (like fresh paper towels), and poke tiny holes in the container. If mold appears, toss the seeds and start fresh—germination won’t happen with compromised seeds!
Can I stratify peach seeds outdoors?
Bury seeds 6–8 inches deep in a pot or garden bed in fall, covering them with soil. Nature handles the cold exposure, and you’ll save fridge space. Just ensure the area drains well to prevent soggy seeds. Pro tip: Mark the spot!
Wrapping up and next steps
Peach seed stratification is your secret weapon for unlocking vibrant spring blooms—no fancy tools or guesswork required! By mimicking nature’s moisture cycles, you’re not just prepping seeds; you’re nurturing the promise of future harvests.
Whether you’re a seasoned gardener or a curious beginner, this method is your ticket to higher germination rates and healthier plants.
Ready to turn those tiny seeds into lush peach trees? Start small—grab a few seeds, follow the steps, and watch your patience bloom into success! 🌱✨ Next up: Plant those stratified seeds in well-draining soil and give them the love they deserve. Happy gardening!